¶ User Manual: Setting Up a VoIP Account in MicroSIP for Windows
¶ Prerequisites:
- Download and install MicroSIP from the MicroSIP official website.
- Ensure you have the following SIP details:
- Server/Proxy: jnb1.nppbx.net
- PJSIP Server/Proxy: jnb1.nppbx.net:5062
¶ Windows Installation Steps:
Open MicroSIP:
- Launch the MicroSIP application after installation.
- Click on the "Account" button (usually at the top of the interface).
Add New Account:
- In the "Account" window, click "Add Account."
- A new dialog box will open for entering SIP account details.
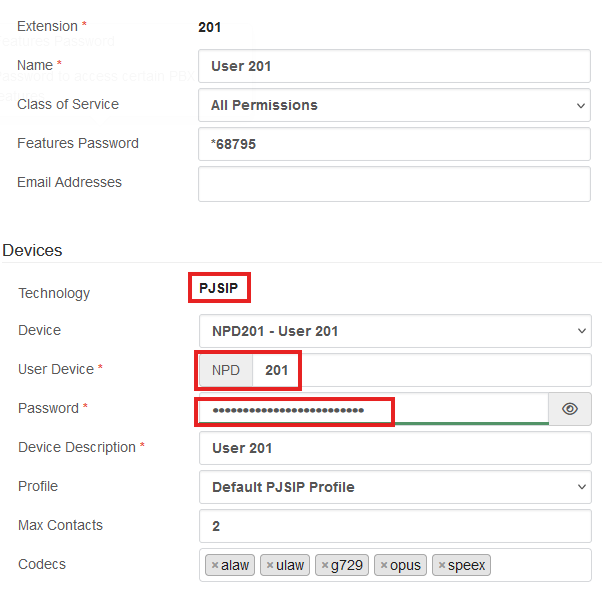
Enter Account Details:
- Fill in the fields with your SIP credentials:
- Account Name: [Choose any name, e.g., "NPPBX"]
- SIP Server: jnb1.nppbx.net
- Username: [Your SIP username, e.g., demo]
- Domain: jnb1.nppbx.net
- Password: [Your SIP password, e.g., demo]
- For PJSIP setup, enter jnb1.nppbx.net:5062 in the SIP Server field.
- Ensure Transport is set to UDP or TCP as required.
- Adjust Outbound Proxy SIP: jnb1.nppbx.net PJSIP: jnb1.nppbx.net:5062
- Example Screenshot PJSIP account.
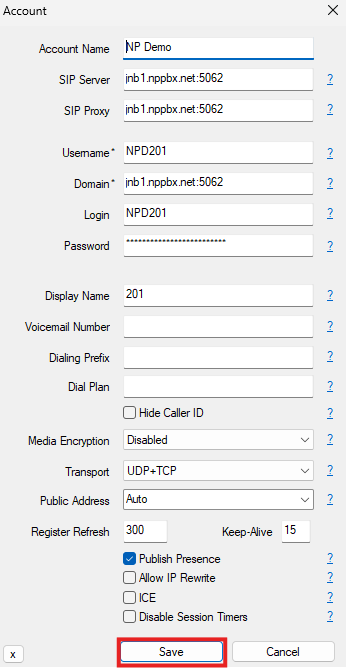
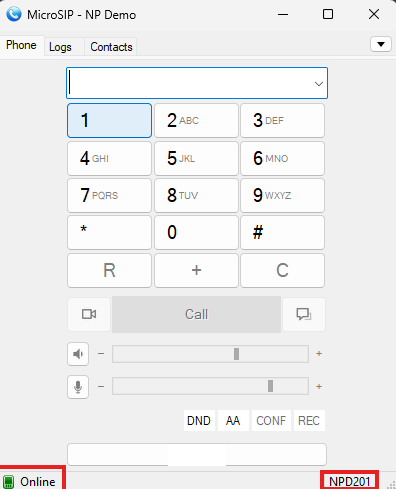
Save and Register:
- Click "Save" to apply the settings.
- MicroSIP will attempt to register the account. Look for a green status indicator at the bottom of the app, showing "Registered."
¶ Mac Alternative Setup:
MicroSIP is designed primarily for Windows. For Mac users, Zoiper is recommended as an alternative SIP client.
Basic Setup Steps for Mac (Zoiper): Follow → https://docs.networkplatforms.co.za/en/SetupZoiper